
Create or edit a reservation
Create a Reservation
There are a few ways to get to the Create Reservation page, so you can create a reservation:
On the Monitor page, click the spot you want to assign, click the three-dot icon in the upper right, and click Create Reservation.
On the Reservations page, click Create Reservation.
On the Spots page, click the three-dot icon next to the spot you want to assign, and click Create Reservation.
On the Spots page, click the spot you want to assign, click the three-dot icon in the upper right, and click Create Reservation.
On the Spots page, click the spot you want to assign, click Calendar, click the three-dot icon in the upper right, and click Create Reservation.
Knowing all the different ways to get to the reservation creation page will make it easy for you to create a reservation no matter where you are in the Web Dashboard.
1. Set the start date and time
In the From field, select the date and time the reservation should start.
Click the field, and a calendar and time selector will appear. Select the date, then select the time.
You can backdate a reservation (if it wasn't reserved when you want to backdate it to) to charge a member from that backdated start time.
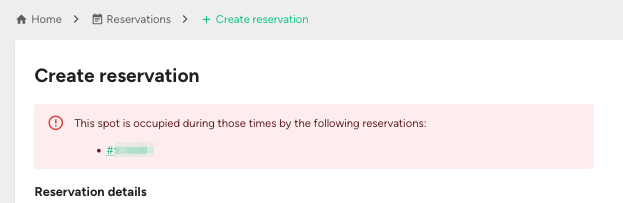
If the spot is already booked during the time you select, a red notice (see below) will appear saying what reservation(s) are during the times. If you plan to set both a start and end date, finish entering both before checking what, if any, reservations already exist during those times. Click on a reservation in the notice to see when that reservation starts or ends, to determine if you need to adjust the reservation you’re creating.
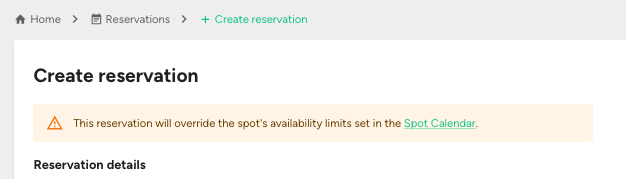
If the spot isn't set as available in its calendar during the times you selected, you'll see a yellow warning notice (see below) that says, "This reservation will override the spot's availability limits set in the Spot Calendar."
An example of when this could happen:
You have a spot in the lot that's just for staff use, so the calendar has no availability times on it (that way it won't show up in search results as available to reserve).
You want to let a resident who's moving in use that spot for their move-in day.
You create a reservation for them in that spot. You'd see that warning notice, since you're creating a reservation during times when the spot is not available on its calendar.
Generally, you can disregard this warning if you're sure you want to assign the spot and know there won't be any confusion with it being used.
2. Set the end date and time (optional)
If the reservation should have a set end date (for example, a two-day reservation), in the Until field, select the date and time the reservation should end.
NOTE: If you set an end date, you will likely need to edit the price of the reservation.
If the reservation should be open-ended indefinitely (so that it'll recur monthly), don’t set an end date.
3. Review the "Cancelable?" setting
Reservations start with the cancelable toggle on, meaning the renter can cancel it. In general, monthly reservations should be cancelable.
Toggle it off if you don’t want the renter to be able to cancel the reservation.
When a renter cancels a monthly reservation, they'll receive a prorated refund from their last monthly payment so that they’re only charged for the days they had the reservation.
4. Select a member to assign the reservation to
In the Select Lot Member field, choose the account to assign the spot to.
After you click the field, you can search for accounts by entering the name, phone number, or email address on an account.
Click on a result to select it.
5. Select a vehicle for the reservation (optional)
Click on the Select Vehicle field to see vehicles on the account you selected, and you can choose one for the reservation. You can also click the "Add new vehicle" option to add a vehicle to the account.
It’s best to let the renter select a vehicle for the reservation in the app on their own.
6. Review the selected spot
The Select Spot field shows the spot being assigned.
If you got to the Create Reservation page from a spot page, this should be the spot you were previously looking at.
If no spot is selected, click on the field and either scroll or type the spot marker to find the spot and select it.
If a spot has "Occupied" next to it, that means it already has a reservation in it during the times you selected.
If a spot has "Unavailable" next to it, that means the spot doesn't have calendar availability during the times you selected. Usually this is done for staff spots, so that they don't show up in reservation search results in the app.
When reviewing the list of spots, you'll see tags next to spots that show if they are Occupied or Unavailable (see below).
Occupied means the spot has a reservation in it during some or all of the time of the reservation you're creating. You cannot create a reservation in a spot that is already Occupied.
Unavailable means the spot's calendar doesn't have availability during some or all of the time of the reservation you're creating. (A spot only shows up in the app search results when its calendar has availability during the times someone is searching for.) You can still create a reservation in a spot that is only Unavailable.
If there is no tag next to a spot, that means it doesn't have a reservation in it, and its calendar has availability in the times you set.

7. Review and edit the price
If you didn't enter an end date, the default price is the spot's monthly rate.
If you want to charge something different, click on the Custom Price option and edit the price in that field.
If you entered an end date and the reservation is more than 45 days, the default price is the spot's monthly rate.
If you entered an end date and the reservation is less than 45 days, the default price is calculated based on the spot's hourly rate.
You should instead use the Custom Price option and calculate a price based on the spot's daily rate.
In the Monitor or Spots sections of the Web Dashboard, find the spot and look at its page to see its daily price. Use that to determine how much the Custom Price should be.
8. Save
After you’ve made your selections, double-check them, then click Save.
If you want to view or edit a reservation after creating it:
After you create it, you'll be on the detail page for the reservation.
A notification will appear in the lower left corner after making a reservation. If you happen to click away from the reservation's detail page, click on the reservation in the notification to view the reservation page.
Or, find the reservation through the spot’s Calendar page or the renter’s Reservations page.
Edit a Reservation
Here are things you may edit about a reservation after it’s been created.
Set an end date
On the reservation’s Details page, click the three-dot icon in the upper right, and click End/Edit.
In the Until field, use the calendar and time selector to choose an end date and time.
You can use this to either add an end date for a reservation that doesn’t have one or change a reservation’s end to be sooner.
You cannot change a reservation’s end date to be later than it already is.
Click Save.
Depending on the type of reservation, you may need to refund the renter manually.
If it’s a short-term reservation, use the Invoices page to refund the renter.
If it’s a long-term reservation, a prorated refund should automatically be created if the end date is during the current monthly period. Check the Invoices section to see if the latest charge is noted as "Partially refunded." If the end date is during the next monthly period, then the member's next charge will be prorated based on that end date.
Don’t issue a prorated refund when ending
When you edit a reservation and set/change the end date, an "Automatically refund last invoice?" toggle will appear.
It starts toggled on. That causes the typical behavior: When you end a reservation earlier than the monthly period end date, a prorated refund for the remaining time is issued to the renter.
If you toggle if OFF, there is no prorated refund. The reservation will end at the end you set, and no prorated refund will be issued.
Change if a reservation is cancelable or not
On the reservation’s Details page, click the three-dot icon in the upper right, and click End/Edit.
Use the toggle next to Cancelable to make it cancelable (green) or not cancelable (grey).
Cancel a reservation
You should only cancel a reservation if it hasn’t started yet and isn't needed.
If a short-term reservation needs to be canceled, it’s best to have the renter cancel it from their app, since that will automatically generate a refund to them, if applicable.
If you cancel a short-term reservation that hasn’t started and the renter should be refunded, you need to use the Invoices page to refund them manually.
Refund a renter
On the reservation’s Details page, click on Invoices.
Find the invoice you want to refund.
Click on the three-dot icon next to it and click Refund.
In the New Total field, enter the new total for the charge (don’t enter how much you are refunding them).
After you enter the new total, the Estimated Refund line will show how much will be refunded to the renter.
Click Submit.
If an invoice's status is Pending or Processing, that means the charge has not been created yet or was created and is processing. You cannot create a refund when an invoice has this status. You’ll need to check back after the charge processes and then create a refund.
Set a price change for the future
The Price Changes page for a reservation is used to change that reservation’s monthly price in the future.
For example, if you want a resident to have a reservation for free for the first three months and then pay monthly after that, you’d create a reservation for them that starts off at $0 per month, and then use the Price Changes page to set a price change to go into effect after three months.
How to create a price change:
On a reservation’s page, click Price Changes
Click Add.
In the Monthly Price field, enter the price you want the reservation to change to on the date you’ll select.
In the Effective Date field, select the date you want the new price to begin.
Renters are charged on the same date and time each month, so you typically want to set a price change to be the same date and time as when the reservation started.
The Effective Date field will typically default to the next month’s monthly renewal date, and the same time as when the reservation started.
If you set a price change to a higher amount on a date or time that's different from the date/time each monthly period starts, the renter will be charged on the following month for the increased rate on the appropriate days.
For example:
A reservation is $100/month and started at 2 p.m. on January 1.
The renter is charged $100 every month, on the 1st.
You set a price change to make the reservation $200/month, starting April 15.
On April 1, they’ll still be charged $100.
On May 1, they’ll be charged both the new $200 monthly charge, and then an additional $50 for the increased rate for April 15-30.
If a reservation already has a price change in place and you create a price change with a date and time that’s sooner than the existing price change, that will remove all price changes that come after it.
If you plan to add multiple price changes for a reservation, add the soonest one first, then the next soonest, and so on.
If you need to add a price change that will come before existing price changes, note all price changes that will be after the one you’re adding. You’ll need to re-add them after you create that new price change.
If you created a price change you no longer want in place, you must create a price change with a sooner date and time than it to remove it. You can do that by adding a price change that equals what's in the Parking line item of the renter's invoices.